Jun 4th 2015
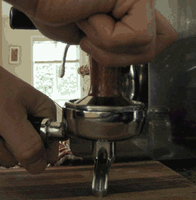
Tamping Technique
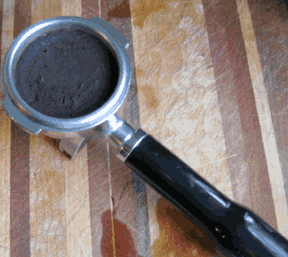
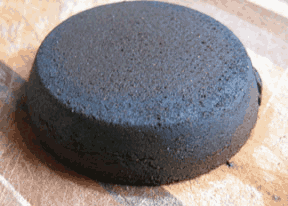
Why should I tamp and why not use the plastic tamper that came with your espresso machine? Tamping is not strictly required to make espresso. Some even believe that you will get the same results from just inserting the ground coffee filled portafilter (coffee handle with basket). I believe that tamping will in fact result in more even and reliably good shots & a properly tamped basket of coffee should be pressed with more pressure than the plastic can provide. (If your espresso maker has a pressurized portafilter you should not bother with tamping. See your owners manual to determine this) Simply put, your job is to compress the coffee grounds enough to slow down the flow rate (of water as it passes through the coffee). I said slow enough, but one must be careful to avoid slowing it too much. There are four things that contribute to flow rate: 1. Your Coffee. Is it fresh, burnt, oily, suitable for espresso? Be sure to get a good bag of coffee or you will probably waste a lot of time. 2. Fineness of Grind. Use a pinch test to determine if you are in the right ball park. pinch between thumb and finger a small amount of grounds. It should bind into a little cake and then easily break apart when you press it again. If it doesn't bind it's too course. If it stays caked up it might be too fine. 3. Volume of Coffee. I am not a big proponent of using a kitchen scale to weigh your coffee on a regular basis (life's too short for that). But you might want to use one while you work this out because the consistency does help develop a good routine. In any case, the amount of coffee you use will be a big variable in the flow rate. 4. Tamp Pressure. The rule of thumb is that you should tamp at 30 pounds. That oversimplifies the process. Tamp pressure should correspond to the other three characteristics to get good results. Ideally you will be combining all four characteristics to get an ever more consistent and delicious shot. Your goal should be to make approximately 1.5 oz of espresso in a double basket with approximately 18 grams of firmly tamped coffee. As the water flows through the coffee it will extract the coffee & the most important factors to your shot are temperature & flow rate. Let's get started. Grind your coffee - weigh 18 grams & level out grounds. After inserting coffee in basket you may have an uneven mound of coffee in the basket. It will likely be higher in the center and lower on the sides - Use a flat edge utensils even the coffee out. You should have even, flat, un-compressed coffee grounds in the basket.
Now -Evaluate the following.
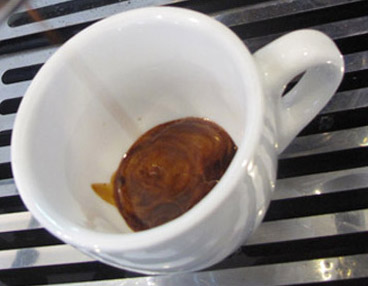
Shot too fast? So... If it's too slow (you guessed it) Crema - A good shot has thick auburn 'crema' covering the shot. If you had a slow shot, light crema or oily pools in black coffee you have certainly over extracted the coffee. Back off the grind and/or tamp.
Look for grounds in the bottom of your cup. That means you have too fine of grind or you may need a new filter basket - they do wear out. Picking the right tamper size: --> 58mm is a common size for many espresso machines including Rancilio, Pasquini, Grimac, Saeco, Gaggia, La Marzocco (old basket needs a 57mm), E61 groups and many more. The filter basket diameter is 58mm or around 2.25 inches and the tamper is slightly smaller allowing insertion. |